Garden Hack: Building with Wood Pallets
Creative ideas for putting recycled wood to use
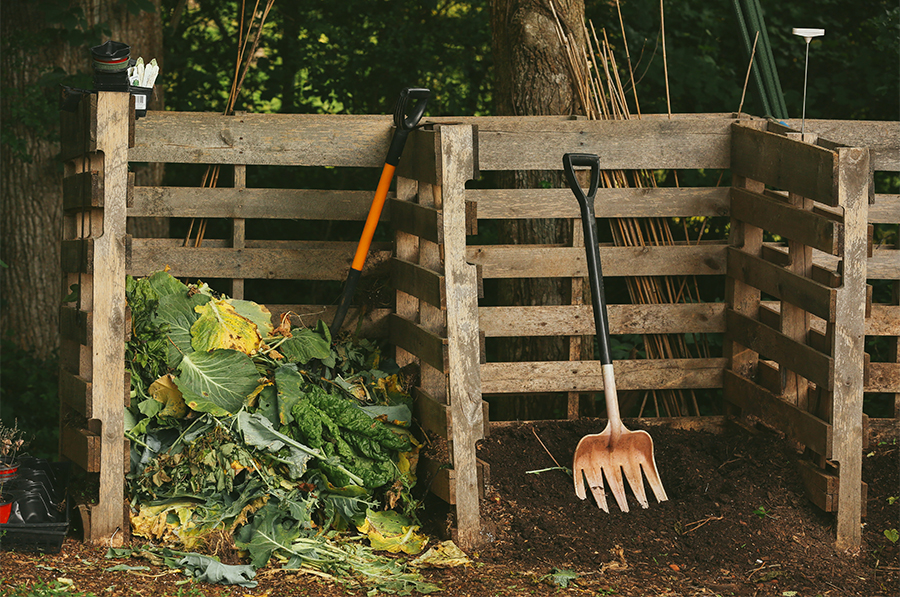
By Pamela A. KeeneWood pallets can be used to make compost bins.
When it comes to repurposing materials for your garden, wood pallets can be the stars of the show. From creating vertical herb gardens for smaller spaces to making rugged, durable outdoor furniture, the versatility of wood pallets is limited only by the imagination.
“In the past few years, with the growing trends in upcycling, recycling and reuse, people have discovered that pallets are a versatile, free source of wood,” says Joe Lamp’l, host of the PBS series “Growing a Greener World” and founder of joegardener.com. “Whether you’re using them for gardening projects or building furniture, pallet wood has a lot of character and is a great resource for DIY projects.”
Pallet prep and safety
Many gardening projects make use of pallets just the way they are, without disassembling.
“For a vertical herb garden or a plant hanger, there’s no need to take the pallets apart,” Lamp’l says. “However, if you’re using them to grow food products, find out about the original use, making sure they haven’t been pretreated with methyl bromide, a broad-spectrum pesticide that has been used to treat soil for pests, weeds and pathogens but that’s highly toxic to humans. Look for heat-treated pallets instead because they are safer and don’t contain harmful chemicals.”
“Pallets made in the United States are typically heat-treated, and by law all pallets made within the past several years must be labeled as either MB for methyl bromide or HT for heat treated. The marking is generally on the end of one of the 2-by-4 pieces.”
Lamp’l suggests pressure-washing pallets to remove any grime or dirt.
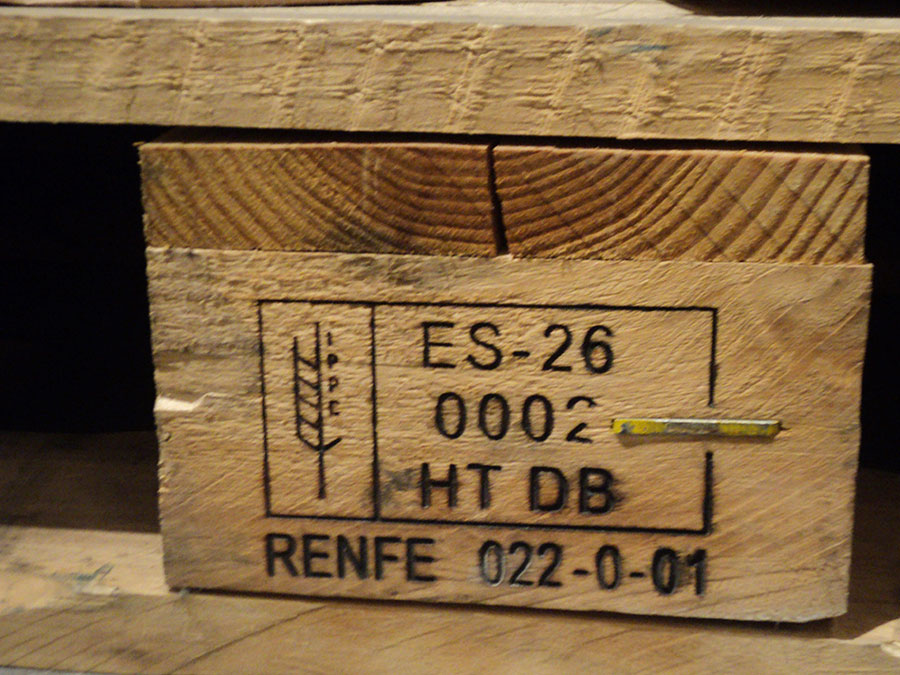
Pallets made within the past several years must be labeled as either MB for methyl bromide or HT for heat treated. The marking is generally on the end of one of the 2-by-4 pieces.
Disassembling pallets for projects can be tricky, but can yield very useful pieces of wood. A word about safety: wear safety googles and work gloves to protect your eyes and hands.
“The most popular and simplest way is to use a reciprocating saw, sometimes called a Sawzall,” Lamp’l says. “Fit it with a blade designed to cut metal, and you can just cut through the nails. You don’t have to remove the nails, and you’re less likely to split the boards.”
You can also use a circular saw to cut the pallet wood from the 2-by-4 supports sawing perpendicular to the supports, then use a crowbar and hammer to remove the center stringers. You’ll still need to remove the nails with a claw hammer.
“Depending on how you’ll use them, once you’ve taken the pallets apart, sand them to remove splinters and create a smoother surface,” Lamp’l says. “You’ll have great wood for garden projects like raised beds (see “Gardeners: Give Yourself a Raise”), compost bins, rugged potting benches and distinctive yet durable outdoor furniture.”
Pallet project ideas
Pallets are versatile. Here are four easy projects to try in your garden:
Vertical kitchen garden
Build this for greens or herbs by standing a clean pallet on end, creating triangle feet to keep it upright, filling it with good-quality potting or container soil, then planting seedlings between the slats. The slats on the front side of the pallet are a bit closer together than those on the back.
“For a one-sided vertical garden that you can either mount on a wall or add 2-by-4 braces to make it free-standing, stretch landscape fabric across the inside of the back and along bottom to help keep the soil in place,” Lamp’l says. He suggests planting garden herbs such as basil, dill, oregano, chives, parsley and thyme along with salad greens, lettuce, spinach and leafy crops. “Don’t be afraid to pack the soil tightly. You’ll also want to put your seedlings a bit closer together than if they were planted in an open garden bed.”
Once it’s planted, put your vertical planter in a sunny, convenient location, and water it well. Monitor to keep it from becoming too dry, and feed it with liquid fertilizer according to the package instructions.
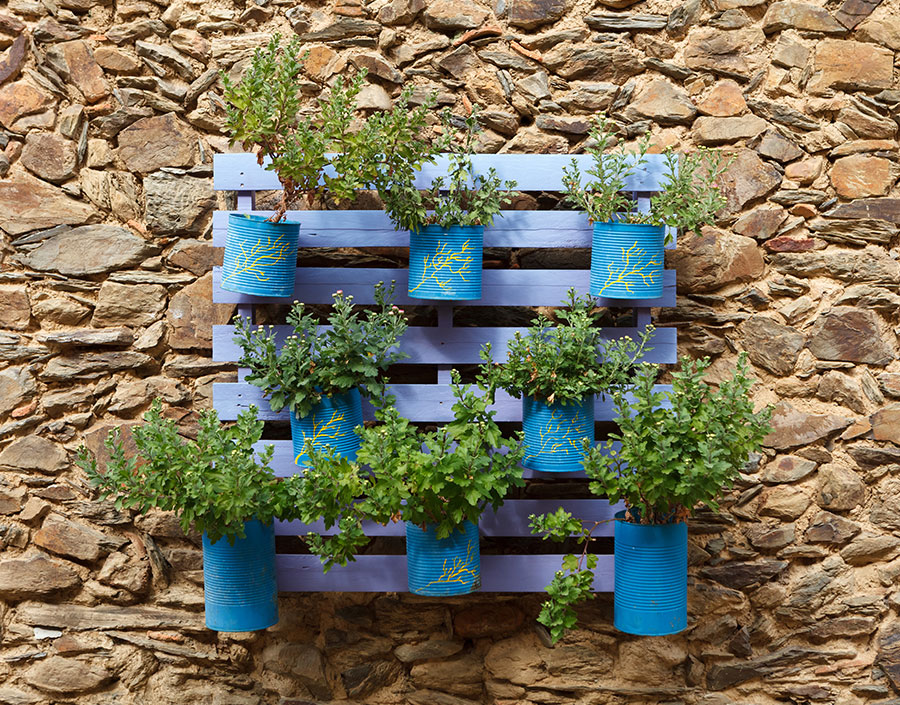
Potted plant hanger
Mount an intact pallet to a wall and then attach metal potted plant brackets, available online or at many big-box retailers, to create this hanger. For interest, paint the slats in cheerful colors and use varying-sized pots.
Compost bin
Tie three wooden pallets together with coat hangers to create a three-sided bin to contain a compost pile. Built out more bays by adding pallets (each bay can share a wall, so two more pallets will get you an additional bay).
“You don’t need any fancy equipment or tools to start a compost heap,” Lamp’l says. “Start with woody materials, branches or sticks that will aid in ventilation, then layer brown, then green materials, using a formula of roughly two-thirds brown and one-third green.”
Examples of green materials, which have a higher nitrogen content, include fresh grass clippings, pulled weeds and nonmeat, nonfat kitchen scraps such as vegetable and fruit peelings and cores, coffee grounds and used tea leaves. Brown ingredients, those that furnish carbon that’s important to the decomposition process, include dried leaves, shredded cardboard or paper, small wood chips and dried grass clippings.
Pallet coffee table
Start this patio focal point by taking apart several pallets. Use two 2-by-4s for each leg, creating 4-by-4 legs. Use the slats to make the top, and face the sides with additional slats. Or, build a table up in layers, calling to mind the original design of the pallets (see photo). Then sand, stain or paint it, and finish with several coats of polyurethane.
“Pallets can be the basis for any number of projects,” Lamp’l says. “I’ve seen people create an indoor accent wall from pallet wood, build headboards or use the wood to frame artwork. Once you’ve discovered the versatility of wood pallets, you’re only limited by your imagination.
About the Author
Pamela A. Keene is a freelance writer and photographer based in Atlanta.-
More Carolina Country garden guides
-
Share this story:

