Frosty Roofs Provide Energy Efficiency Clues
Is your home losing heat during the winter?
By Jonathan Susser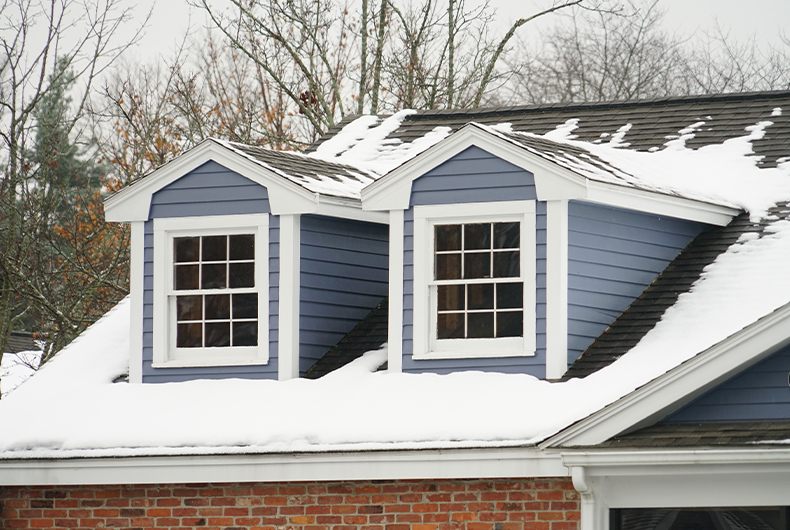
Q: I’ve noticed that some homes in my neighborhood have frost on their roofs, but mine doesn’t. Should I be concerned?
A: Good observation. Assuming the general location and sun exposure of the homes are comparable, a lack of frost on your roof could indicate that heat is leaking out of your house, and warming up and thawing the ice and snow above.
This situation isn’t a major concern, but it can be associated with some negative outcomes. For example, there’s an energy penalty because your heating (and maybe cooling) system will need to work harder to replace the conditioned air that is being lost to the attic and outside.
Why should air sealing be done before insulating? Air sealing and insulating can be thought of as a windbreaker and sweater, respectively. You want the windbreaker in place first to make the sweater more effective.
Your comfort, in terms of temperature and air movement, could also be impacted. Poor insulation coverage in your attic — which could be contributing to the escaping heat — could trigger cold and drafty spots in parts of your home. Moisture and condensation problems could arise too, including microbial growth, discoloration, dust and mold. You may even start to see paint peeling or bubbling.
While the above consequences aren’t ideal, a more serious winter issue is known as ice damming. Ice dams are rare in our climate, fortunately, but they can occur when the snow on a roof goes through cycles of thawing and refreezing, eventually creating a buildup of ice that can seep into your home and cause water staining and related damage to your roof and ceiling. All in all, a lack of rooftop frost is probably worth looking into.
If you had an inkling that something was awry but didn’t see any signs, you could check your monthly energy bill for clues. Winter and summer bills are generally higher than other times of the year because of the need for heating and cooling, respectively. But if this year’s winter expenses are substantially higher than last year’s, something may be going on that needs fixin’.
The solution for this heat-leaking problem likely requires a combination of air sealing and insulating. The undertaking may be a weekend-warrior project that you tackle on your own, or you may prefer the help of a contractor. If using the latter, be sure to ask friends, neighbors and the internet for references.
You’ll want to start by sealing any and all gaps, cracks and holes between your attic and living space. (Thankfully winter is a more pleasant time to spend in the attic than summer!) You may have to maneuver around the insulation to locate them, and dirty insulation (with dark spots indicating that the insulation is acting as a filter) may be a sign that a hole is nearby. Alternatively, there may be holes above cabinets or around showers that are clearly visible from above.
After covering and air sealing, go back and make sure the insulation is present and consistent throughout the space, including the attic access door. Aim to have at least 13 inches of insulation, though around 15 inches can be best if you want to maximize savings.
Why should air sealing be done before insulating? Air sealing and insulating can be thought of as a windbreaker and sweater, respectively. You want the windbreaker in place first to make the sweater more effective.
Hopefully this sequence of steps does the trick, and you start seeing bill savings, experiencing better comfort and spotting that frosty rooftop shine once again.
-
More ways to save
-

Which Heat Pump Option is Right for My Home?
Learn the difference between ducted, mini-split and geothermal heat pumps -
Share this story:


